Changing your Hazel Glen password
Your password is your key to your school identity, passwords are valid for SIX months, so you must change your password at least twice a year. This helps protect you and Hazel Glen's network from possible breach of IT security.
Time to update or change your Hazel Glen Password?
To change your password click here to visit the password change portal.
Forgotten your password?
Changing your password is quick and easy, but if you need assistance or have forgotten your password, please contact a member of the Hazel Glen Digital Services Team for assistance.
Troubleshooting
- When you change your password, you must also update any other PC or device with your Hazel Glen UserID and password stored on it. Devices may include a teacher notebook, iPad, other tablet, mobile phone and any other PC you use, including those at home.
- Your new password must be different from your last password and it should contain:
o Between 8 and 32 characters
o At least one character from at least three of the following sets:
> Uppercase letters (A-Z)
> Lowercase letters (a-z)
> Numerals (0-9)
> Special characters such as ()~#$*&@^
Password tips
Your new password must be different from your last password and it should contain:
o Between 8 and 32 characters
o At least one character from at least three of the following sets:
> Uppercase letters (A-Z)
> Lowercase letters (a-z)
> Numerals (0-9)
> Special characters such as ()~#$*&@^
The hard part is choosing a good password that is easy to remember. If you do have to write down your password, then please do not make it obvious. Write it as part of a sentence and leave off a letter to make it more cryptic. If you carry a chronicle, write it on an important date to you, rather than the front cover. Do not stick it on your laptop or give it an obvious title like My Password.
Do
- A passphrase (more than 13 characters) is a sentence or several random words like, ‘I like swimming’. You don’t need to include special characters and you can include spaces.
- Or use a combination of special characters (at least eight) including at least three of the following:
- upper case letters
- lower case letters
- numbers
- symbols
Don't
- Use your username or part of your name in your password.
- Write down your password.
Keeping your password safe
- Never share your password - you're responsible for keeping your password private. Sharing your password is a breach of the Acceptable Use Policy.
- If someone accesses your account using your password, you're held responsible for their actions. A malicious user can have a severe impact by deleting your files, reading private emails, sending offensive or abusive emails, sending spam.
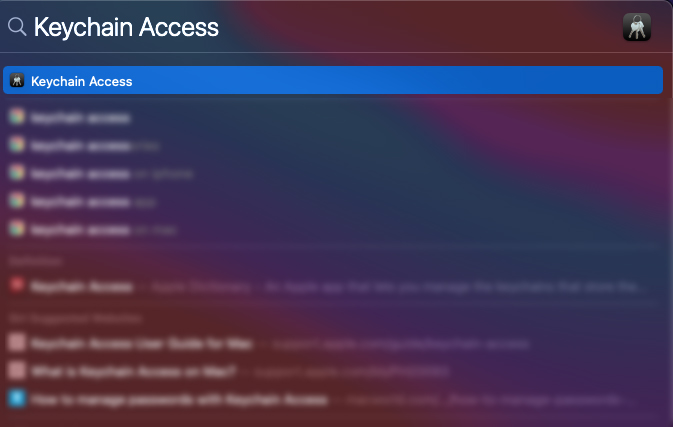
- Press Command (
 ) + Space and search for 'Keychain access' and select enter
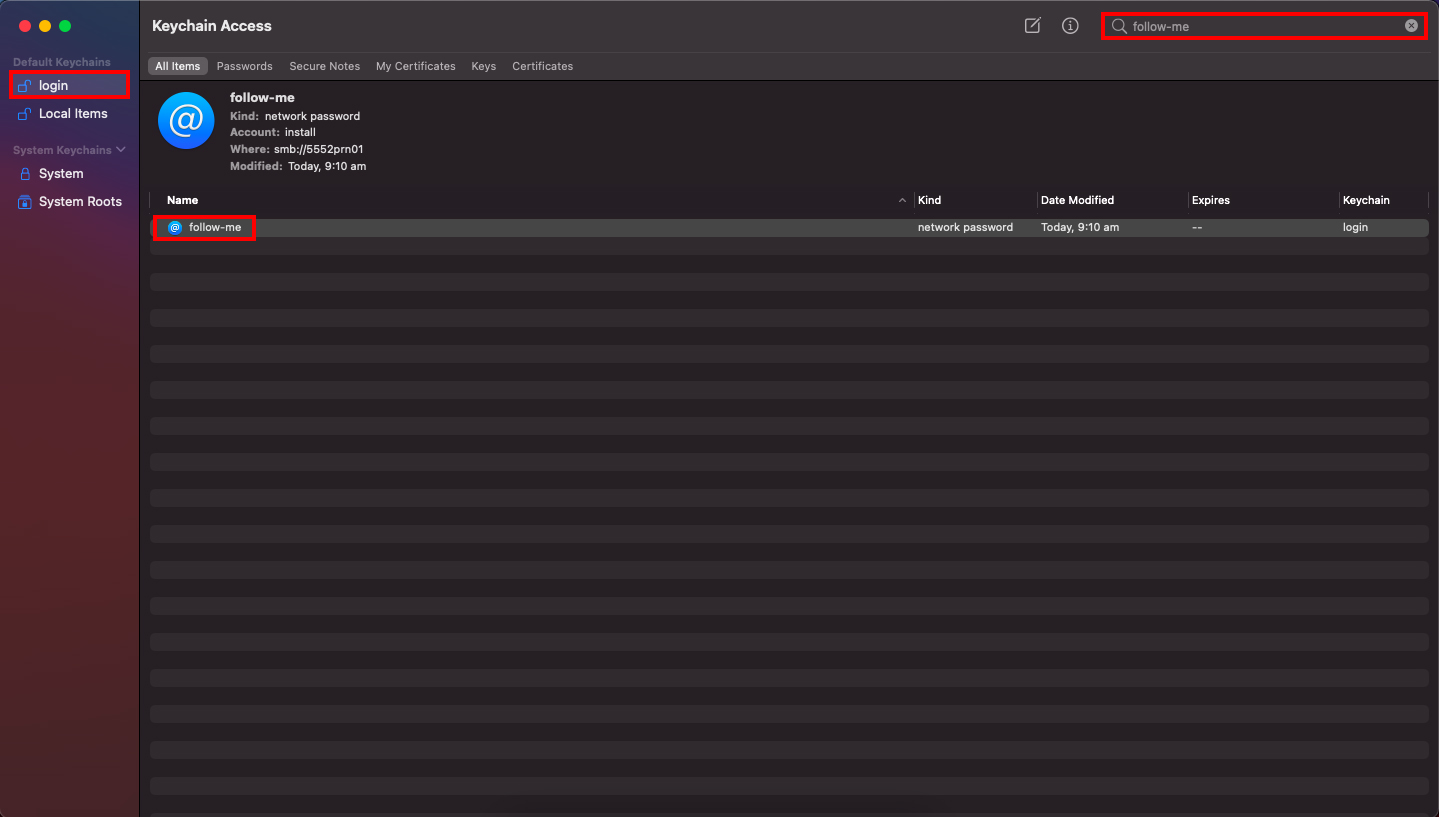
- In the Keychain Access:
- If the padlock is locked, click and enter your Mac password to unlock settings
- Under Keychain, select login
- Under Category, select All Items
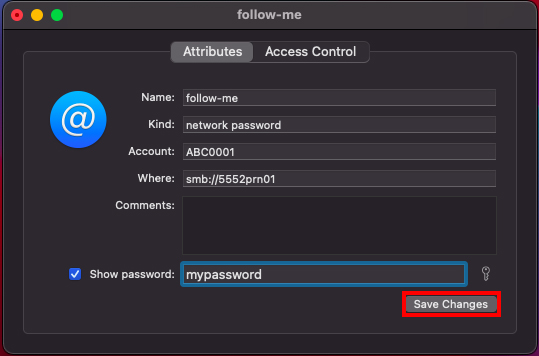
- In the Search box, search for follow-me
- Double-click on follow-me
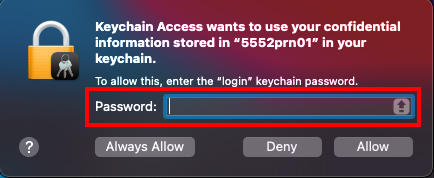
- Tick Show Passwords
- Type in your computer password
- Select Allow
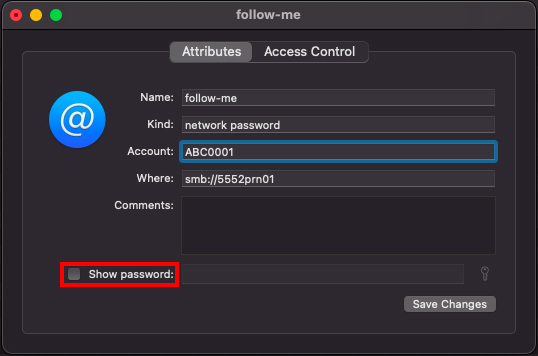
- Your password will be shown in plain text - delete it and enter your new password
- Click Save Changes
- Your password has been updated and you're ready to print
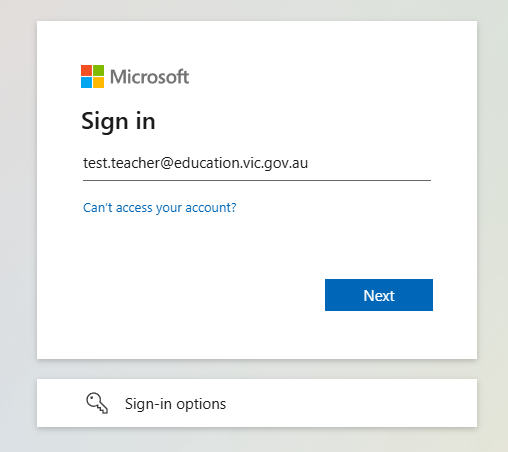
- To start click click here and login using your Hazel Glen College email account
 IMPORTANT
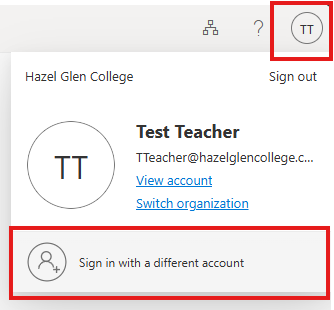
Ensure you login using your HGC account. If you are loged in with another account, click your Account icon (your photo or initals) in the top right hand corner and then select sign in with a different account.
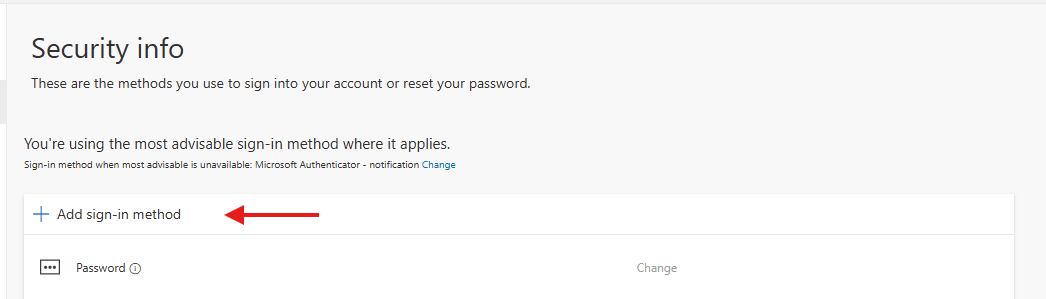
- Click on Update Info.

- Click on Add method
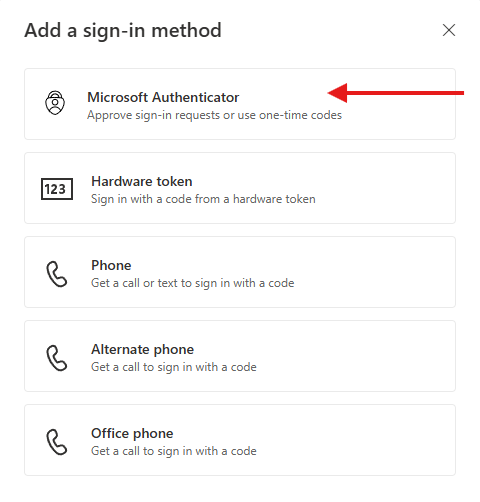
- Click on Microsoft Authenticator
- On your Mobile phone:
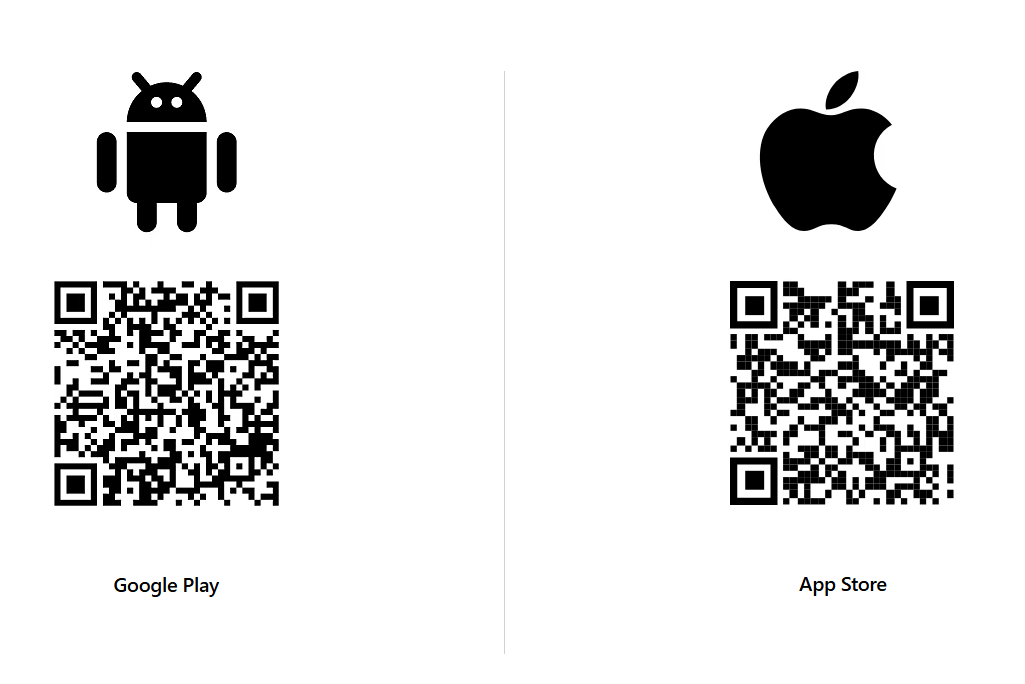
- For Android device, scan the QR code above or open the download page from your mobile device.
- For Apple device, scan the QR code above or open the download page from your mobile device.
- Open the Authenticator app
- Select (+) > add work or school account.
- Using your phone, scan the QR code on your desktop or follow the instructions provided in your account settings.

- Follow prompts through till completion. A code will be sent to test authentication is working. Once validated, your first method is set up.
- On your desktop - go back to add sign-in method screen and select second method eg. phone and follow steps through, clicking next when prompted

Time to setup your Mobile. Go to step 5.1 or 5.2. Keep this page open while setting up mobile.
Follow the steps below to add your account. You will be working between your laptop and your phone, once you have downloaded the app, hit next on the laptop till you get to the QR code for step 8
Now move onto registering MFA with your eduPASS account
- To start click your Account icon (your photo or initals) in the top right hand corner and then select sign in with a different account
 IMPORTANT
Ensure you login using your eduPASS email account.
- Click on Update Info.
- Click on Add method
- Click on Microsoft Authenticator
- On your Mobile phone:
NOTEFollow the steps below to add your account. You will be working between your laptop and your phone, hit next on the laptop till you get to the QR code for step 8
- Open the Authenticator app
- Select (+) > add work or school account.
- Using your phone, scan the QR code on your desktop or follow the instructions provided in your account settings.
- Follow prompts through till completion. A code will be sent to test authentication is working. Once validated, your first method is set up.
- On your desktop - go back to add sign-in method screen and select second method eg. phone and follow steps through, clicking next when prompted
- Follow prompts through till completion. A code will be sent to test authentication is working. Once validated, your first method is set up.
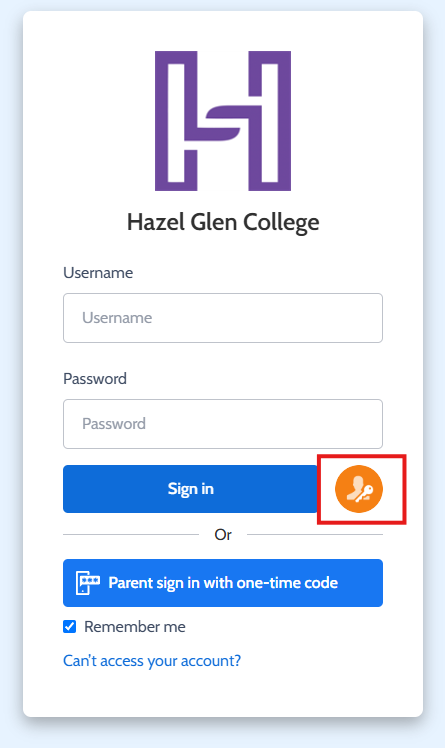
- Test loging into Compass using MFA by clicking here and then select the orange login button on the Compass login screen